How to pre-populate Calendly information from WpForm in WordPress?

Share:

Facebook
Twitter
LinkedIn
Pinterest
WhatsApp
Table of Contents

Introduction

Are you searching for a method to automatically populate your Calendly form with WPForm submissions? You’re in luck! There’s currently no plugin or integration app (such as Zapier) available that offers this specific integration. In this article, I’ll guide you through a step-by-step process to achieve this functionality using custom code, without the need to purchase any additional plugins or tools.

In the scenario I’ll be demonstrating, the WPForm is embedded on a page. After the form is submitted, a Calendly form opens in a popup, which I’ve created using Elementor Popup Builder.

How It Works

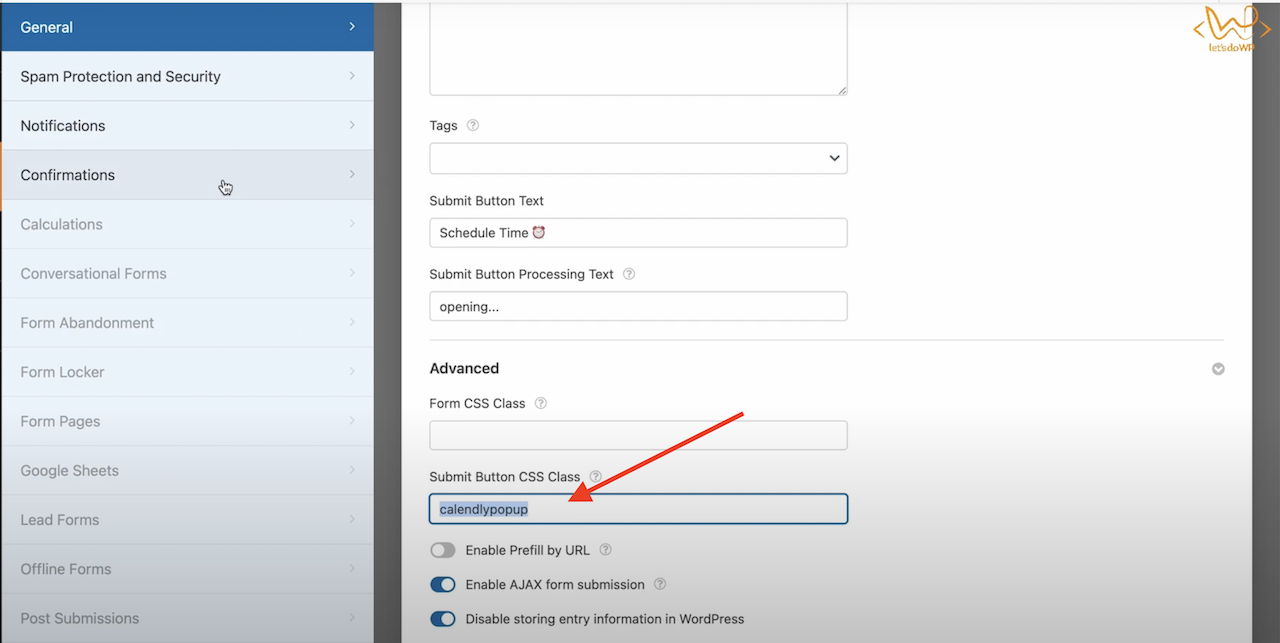
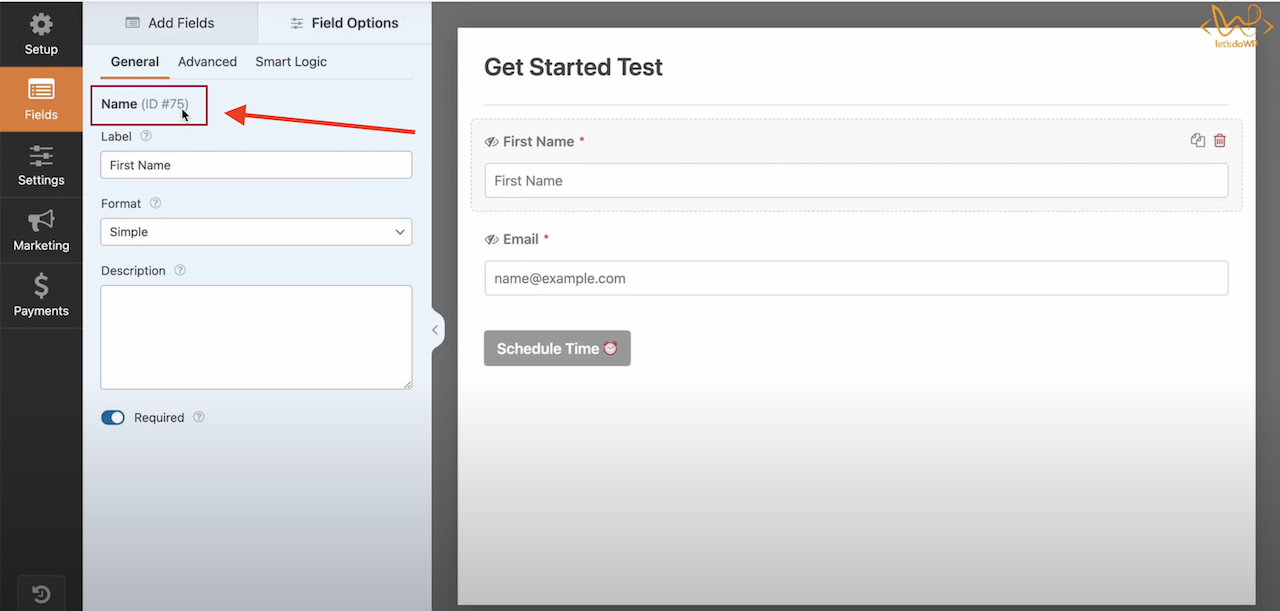
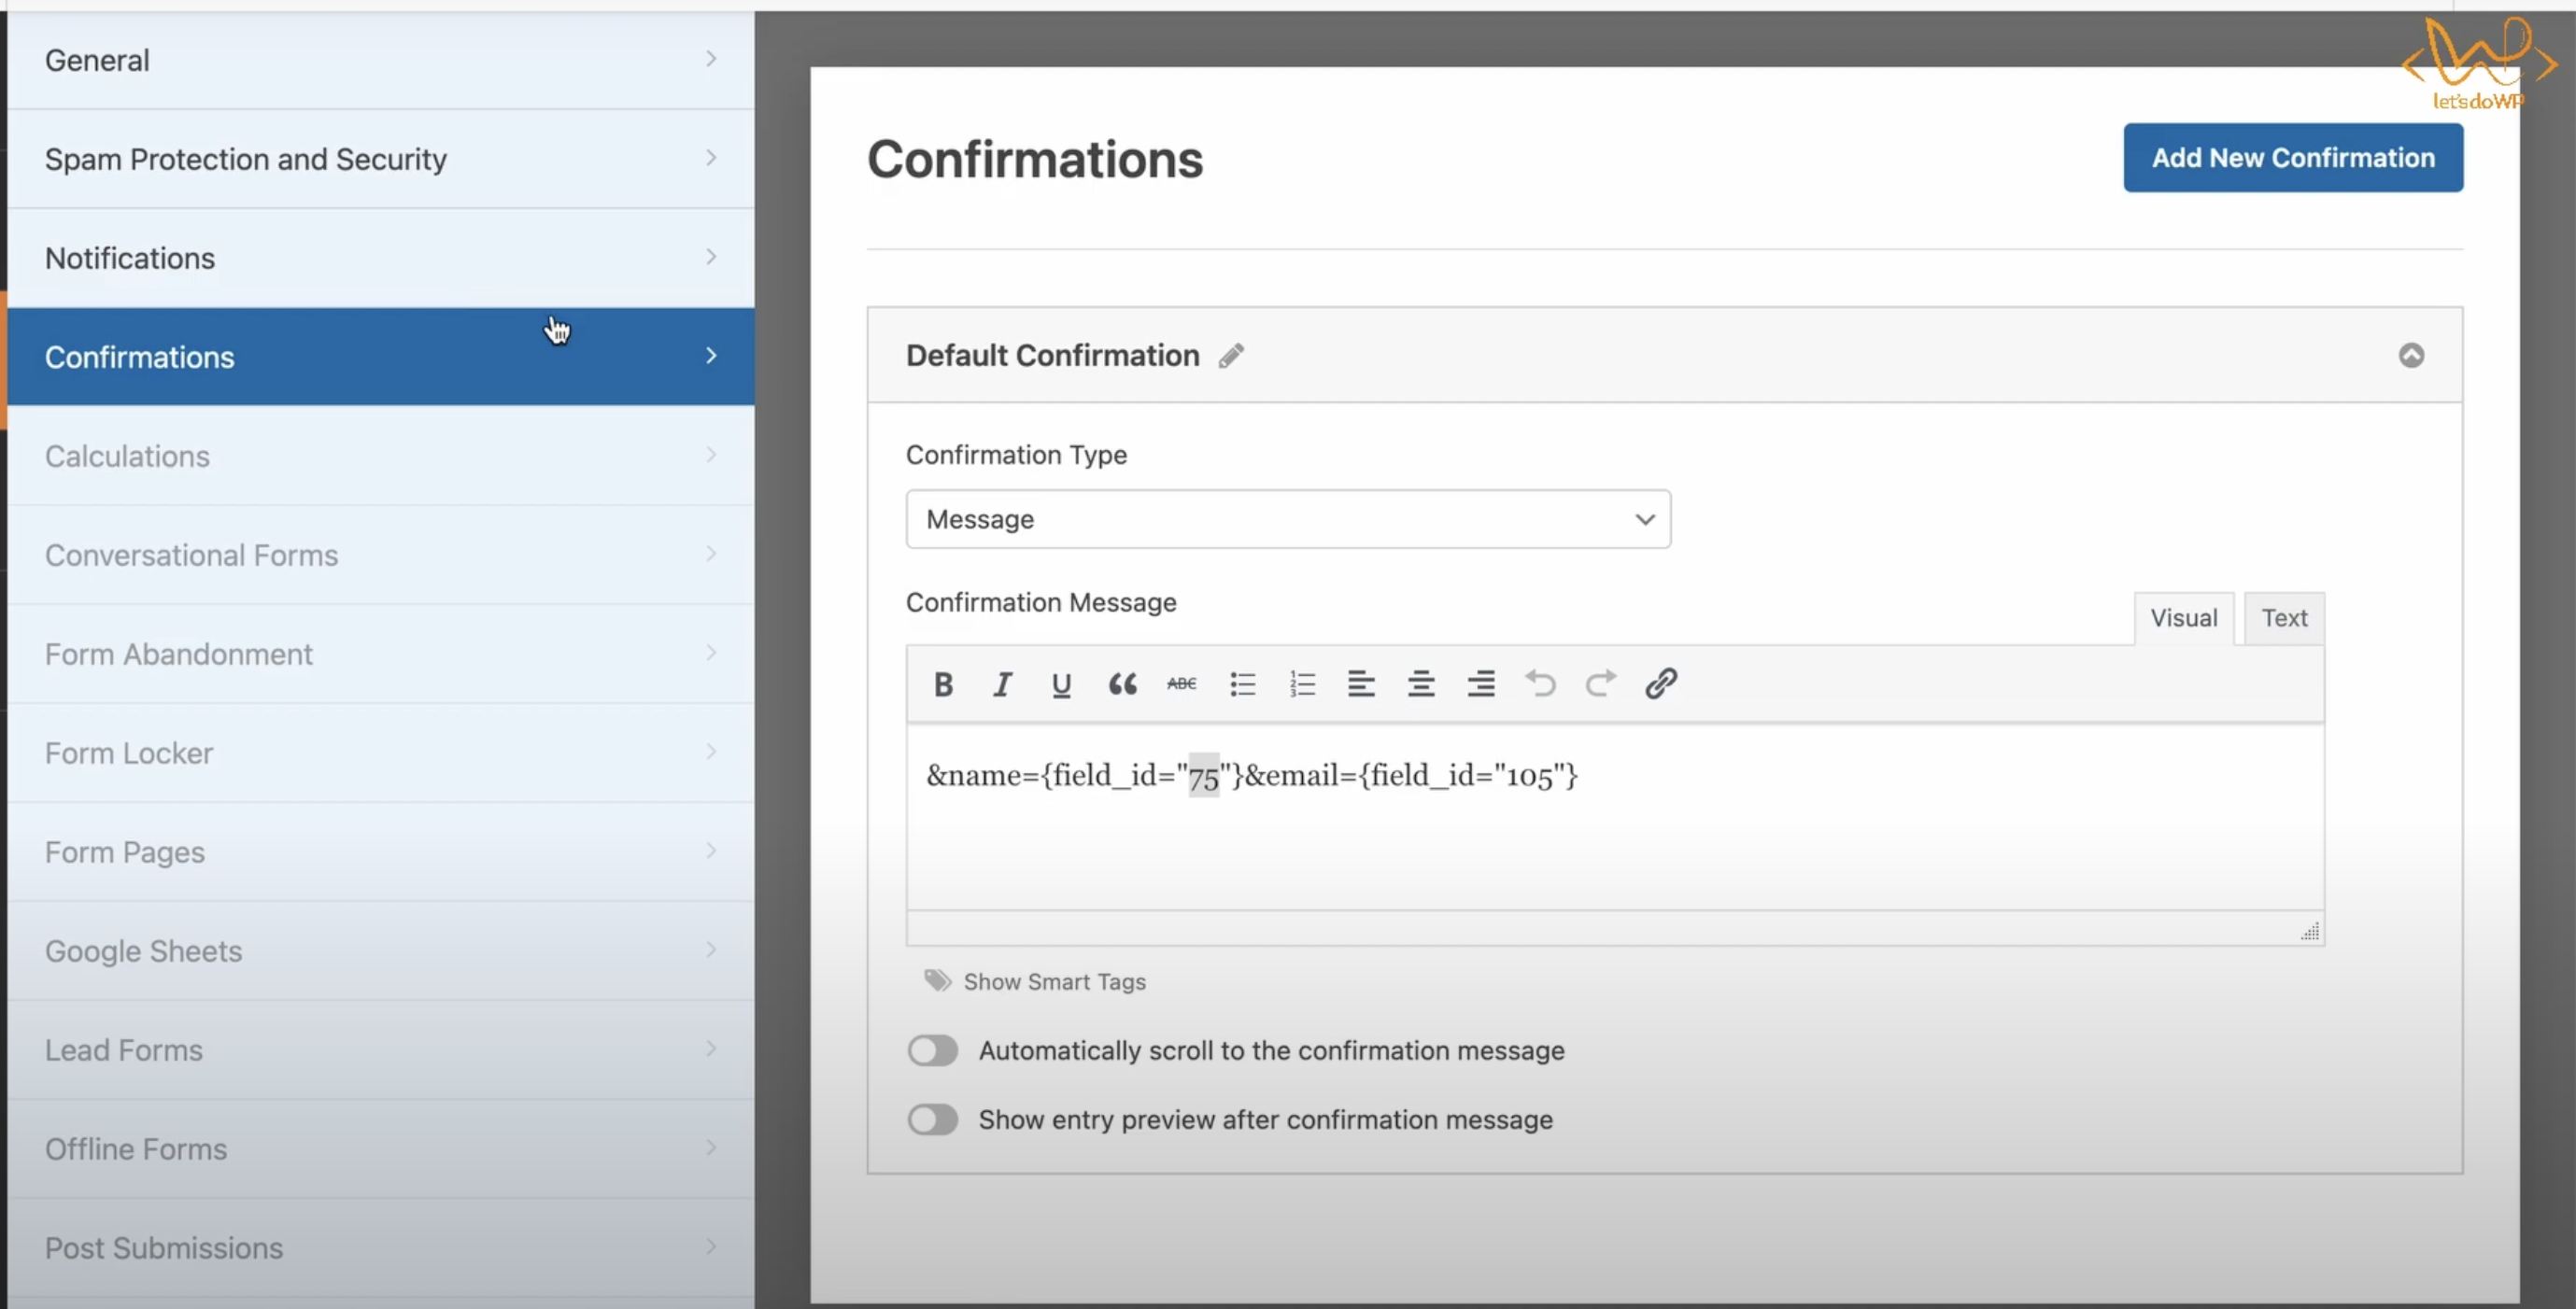
I’ve integrated a WpForm into the website, extracting specific field values using their shortcodes to prepopulate a Calendly form. The extracted values are then added to the confirmation message in a visually appealing format.

On the frontend, the prepopulated fields look like this:


The JavaScript code snippet below serves the purpose of prepopulating Calendly form fields embedded on a WordPress website through WpForms. The script dynamically retrieves customized data from the WpForms Confirmation Message using its unique ID. It then targets the Calendly form using the class “.calendly-inline-widget” and updates the iframe src code accordingly. This seamless integration ensures a smooth and efficient data pre-filling process between WpForms and Calendly.

CODE

				
					< script >
    document.addEventListener('DOMContentLoaded', function() {
   
        var wpformsSubmitBtn = document.querySelector('.calendlypopup');
        // Run the code after 1.5 second when Submit button is clicked in WpForm.
        wpformsSubmitBtn.addEventListener('click', function() {

            setTimeout(function() {
                // Get the current src attribute of the iframe
                var iframe = document.querySelector('.calendly-inline-widget iframe');
                var currentSrc = iframe.getAttribute('src');

                // Fetching Confimration Message from WpForms Submission
                var confirmationDiv = document.getElementById('wpforms-confirmation-2121'); // replace it with your wpform confimration message ID
                if (confirmationDiv) {
                    var pTag = confirmationDiv.querySelector('p');
                    if (pTag) {
                        var newParamValue = pTag.textContent; // Get the text from the p tag
                    }
                }
                // Updates Iframe Code of Calendly
                var newSrc = currentSrc + newParamValue;
                // Update the src attribute of the iframe
                iframe.setAttribute('src', newSrc);
            }, 1500);
        });
    }); 
</script>


STEPS TO APPLY THIS INTEGRATION BETWEEN WPform and Calednly

Step 1:

Edit the WpForm > Go to Setting > Click on General > Scroll down and add the class “calendlypopup” in the Submit Button CSS Class Field.

Step 2:

Now you have to copy the fields id in WpForms which you want to populate in Calendly. In this example, I will be pre-populating Name and Email Fields. For Name go to Fields and click on Name Field input there you will see Id in (ID # 00) format. Only save the ID number in Text Editor. Repeat the same step for the Email Field.

Step 3:

After that go to the Comfirmations option in the Form and update the confirmation message field with the following string &name={field_id=”00″&email={field_id=”00″} not that in this string the “name” is the variable name which you can set 

Step 4:

Now open the form in the front end and do a test submission in the form. Once submission is done you will see a confirmation message. Inspect the page with the developers tool and search for wpforms-confirmation you will see an ID like this “wpforms-confirmation-2121”. In your case, id number will be different. Copy it.

Step 5:

In the Js code replace wpforms-confirmation-2121 id with your form confirmation message id.

Step 6:

Hide the confirmation message from users by adding following css code #wpforms-confirmation-2121{visibility:hidden !important;font-size:0px !important;} replace the ID with your form confirmation message ID.

Step 7 (Last):

The Last Step is to add/run JS code in the website using the JS Snippet Plugin.

Share:

Facebook
Twitter
LinkedIn
Pinterest
WhatsApp
Subscribe
Notify of
guest
0 Comments
Oldest
Newest Most Voted
Inline Feedbacks
View all comments
Related Articles